To create smooth, velvety microfoam at home, start by filling your pitcher one-third full with cold milk. Position the steam wand just below the surface to introduce air, then gradually submerge it as the milk warms. Focus on keeping the wand near the surface to produce microbubbles, and monitor the temperature to avoid overheating. Gentle swirling and tapping help refine the texture. Keep practicing this technique, and you’ll soon master microfoam that elevates your coffee experience.
Key Takeaways
- Use a cold milk pitcher and fill it about one-third full for better microfoam development.
- Position the steam wand just below the milk surface to introduce air for microbubble formation.
- Maintain a steady angle and circulate the milk during steaming to create smooth, velvety microfoam.
- Aim for a temperature of 140-150°F (60-65°C) and stop steaming once reached to prevent overheating.
- Tap, swirl, and gently whisk the milk after steaming to refine microfoam and achieve a shiny, velvety texture.
Have you ever wondered how baristas create those smooth, velvety foam for lattes and cappuccinos? The secret lies in mastering milk texturing, which involves frothed milk and milk steaming techniques. While it might seem intimidating at first, with a little practice, you can achieve cafe-quality microfoam right at home. The key is understanding how to properly steam milk and incorporate air to create that luscious, silky texture that makes coffee drinks so enjoyable.
Master milk texturing at home for velvety latte art and café-quality microfoam.
When you start, focus on milk steaming. Using the right equipment, like a steam wand or an electric milk frother, is essential. For milk steaming, fill your pitcher about one-third full with cold milk. Cold milk steams better because it produces more stable foam. Then, position the steam wand just below the surface of the milk, turning on the steam to introduce air. You’ll hear a gentle hissing or screeching sound—this indicates air is being incorporated to create microbubbles. As the milk begins to warm, submerge the wand deeper into the pitcher, and tilt it slightly to help circulate the milk, ensuring even heating and texture development.
Throughout the steaming process, keep an eye on the temperature. Ideally, aim for around 140-150°F (60-65°C). Overheating can scorch the milk, ruining its flavor and affecting the foam’s consistency. Use your hand to gauge the pitcher’s temperature or a thermometer for precision. Once the milk reaches the right temperature and has expanded in volume, turn off the steam wand promptly. Now, the milk needs to be tapped gently on the counter and swirled or whisked to remove larger bubbles and integrate the microbubbles evenly.
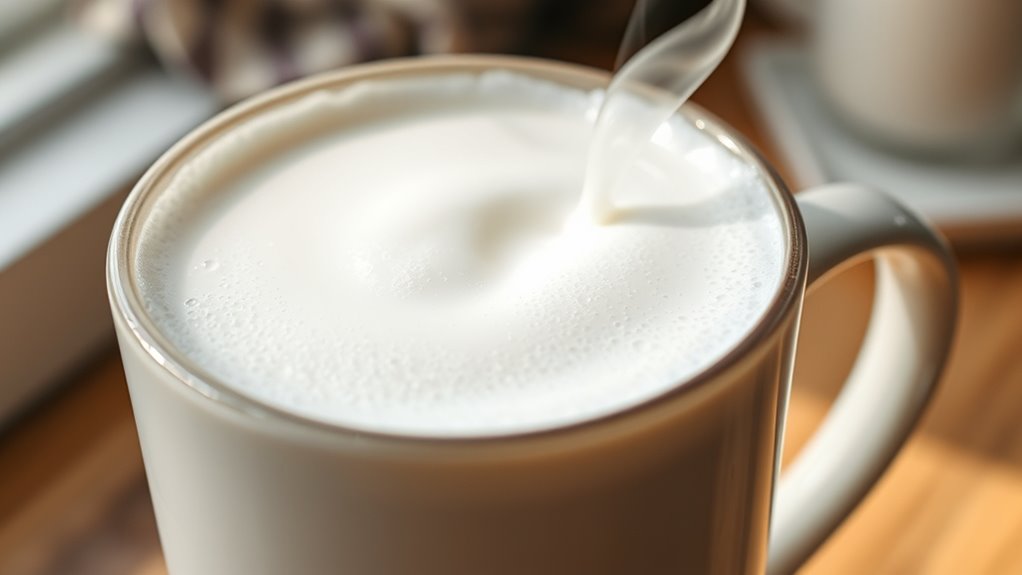
Frothed milk is the result of this steaming process. Good frothed milk should be shiny, smooth, and have a velvety, paint-like consistency. The microfoam is what makes latte art possible and gives your drinks that professional cafe look. To improve your technique, consider proper steaming by practicing consistency in your process and paying attention to the texture and temperature of the milk. Remember, patience and practice are essential. With each attempt, you’ll learn how to control the steam wand, get the right amount of air into the milk, and produce a perfect microfoam.
In the end, making frothed milk through milk steaming at home is about understanding the process and paying attention to details. Once you master it, creating latte art or simply enjoying a beautifully textured drink becomes a satisfying routine. The more you practice, the easier it gets to produce that rich, creamy microfoam that elevates your coffee experience to a whole new level.
Frequently Asked Questions
Can I Use Plant-Based Milk for Microfoam?
Yes, you can use plant-based milk for microfoam. Plant milk variations like oat, almond, soy, and cashew work well because they froth easily and create creamy microfoam. Dairy-free alternatives are great options for those with lactose intolerance or dietary preferences. To get the best results, make sure to use fresh, cold plant milk and steam it just until it reaches the right temperature, ensuring a smooth, velvety foam.
What Is the Best Temperature for Steaming Milk?
Sure, you want perfect microfoam, right? The best temperature for steaming milk is around 140-150°F. Too hot, and you’ll turn that silky microfoam into a burnt, scalded mess; too cold, and it’s like frothing a glacier. Use proper steaming techniques—keep the wand just below the surface, create a whirlpool, and monitor the milk temperature with a thermometer. That’s how you achieve velvety microfoam every time!
How Do I Clean My Milk Frother Properly?
To clean your milk frother properly, start by unplugging it and pouring out any remaining milk. Use a cleaning brush to scrub away milk residue from all surfaces, especially around the nozzle and inside the frother. Rinse thoroughly with warm water and mild soap. If your frother is dishwasher safe, run it through a cycle. Regular cleaning prevents buildup, ensuring your frother stays hygienic and works perfectly every time.
Why Is My Microfoam Too Frothy or Flat?
Like a painter adjusting their brush, you need to refine your technique. If your microfoam’s too frothy or flat, it’s likely due to inconsistent milk temperature or improper frothing motion. Aim for a silky milk consistency with good froth stability, not too hot or cold. Keep the steam wand just below the surface, and practice steady, gentle movements. With practice, your microfoam will become perfectly balanced and creamy.
Can I Make Microfoam Without Any Special Equipment?
Yes, you can make microfoam without special equipment by using alternative techniques and common frothing tools. Try shaking heated milk in a tightly sealed jar until it froths, or use a whisk or a manual pump frother for better results. These methods require some effort but can produce smooth, microfoam when you control the technique and temperature, giving you a great coffee experience without investing in expensive equipment.
Conclusion
Now that you’ve mastered milk texturing at home, you can effortlessly create café-quality microfoam whenever you want. Remember, even a humble kitchen whisk can turn your milk into silky perfection—no need for fancy gadgets. With patience and practice, you’ll feel like a barista in your own kitchen, channeling the spirit of a bygone era when craftsmanship meant everything. So go ahead, make that mug of microfoam and enjoy your own little slice of coffee heaven.