To do edge painting on leather, start by carefully preparing the edges—sanding or burnishing until smooth. Next, apply a thin, even layer of paint using a brush or applicator, allowing each coat to dry fully before adding another for vibrancy. For professional results, practice blending colors and controlling your strokes. With patience and attention to detail, you’ll achieve clean, vibrant edges. Keep going to discover tips that can elevate your leather finishing skills even further.
Key Takeaways
- Prepare edges by sanding or burnishing for a smooth, adhesive surface.
- Apply thin, even coats of edge paint using a brush or applicator, allowing drying between layers.
- Use blending techniques like feathering to create gradients or ombré effects on the edge.
- Maintain consistent, controlled strokes and let each coat dry thoroughly for a clean finish.
- Finish with burnishing or edge dressing to enhance sheen and smoothness for a professional look.

If you want to give your leather goods a polished, professional look, edge painting is an essential skill to master. The techniques overview involves several steps that, when executed correctly, result in clean, vibrant edges that elevate the overall craftsmanship of your project. First, you need to prepare the edges by sanding or burnishing them until they’re smooth and rounded. This creates a perfect surface for the paint to adhere to, ensuring a neat finish. Once the edges are prepped, you apply a thin, even layer of edge paint using a brush, foam applicator, or even a specialized edge painting tool. The goal is to avoid excess paint, which can cause drips or uneven coverage. After the first coat, you let it dry thoroughly before deciding if a second coat is necessary, especially if you want a more opaque or vibrant color.
Color blending plays a fundamental role in achieving a professional look. When working with multiple shades, you can blend colors directly on the edge for a gradient or ombré effect, which adds depth and a custom touch to your leather piece. To do this effectively, you start with one color and carefully feather the edges with a second color while the paint is still wet. This blending technique requires a steady hand and patience, but it yields a seamless transition between hues. For more precise control, you might use a fine brush or a blending tool to gently merge the colors. It’s important to work quickly, as wet paint can be manipulated easily before it dries. Additionally, understanding load calculations ensures you use the right amount of paint and tools, leading to a more professional result.
A pivotal part of the process is maintaining consistency in the paint application. Use light, controlled strokes and keep the paint supply steady to avoid streaks or patchy spots. Once you’ve achieved the desired color and coverage, allow the edge to dry completely. Some artisans finish with a burnishing tool or a bit of edge dressing to smooth out any imperfections and add a subtle sheen, further enhancing the overall appearance. With practice, you’ll develop an eye for color blending and learn how to control the paint flow for crisp lines and smooth gradients. Remember, patience and attention to detail are key. Over time, your skills will improve, making your leather projects look even more refined and professional. Edge painting, when done correctly, truly transforms simple leather into a durable, visually appealing piece that stands out.

BUTUZE Convenient Leather Edge Dye Pen, Colorful Edge Roller Applicator,Essential Leather Edge Printing Tool for Leather Craft DIY,Leather Working,Leather Making
Edge dye pen size:length is 5.2inch/13cm,width is 0.6inch/1.5cm,head length is 0.7inch/1.8cm.
As an affiliate, we earn on qualifying purchases.
As an affiliate, we earn on qualifying purchases.
Frequently Asked Questions
Can Edge Paint Be Removed Once Applied?
Yes, you can remove edge paint to restore leather edges. To do so, use a gentle solvent like acetone or a leather-safe remover, applied carefully with a soft cloth. Gently scrub to loosen the paint, then wipe away. Be cautious to avoid damaging the leather. Removing edge paint can be delicate, but with patience, you can restore your leather edges to their original look without much hassle.
What Types of Leather Are Suitable for Edge Painting?
Think of leather as a canvas; some types are perfect for edge painting. You’ll find full-grain and top-grain leathers most suitable because they hold suitable finishes well, like a sturdy wall that keeps paint intact. Avoid delicate or porous leathers, like suede, which can absorb paint unevenly. If you’ve ever painted a smooth surface, you know the key is choosing the right material—leather types matter for a flawless finish.
How Long Does Edge Paint Typically Last?
You’ll find that edge paint durability varies, but with proper application and sealing, it can last several years. Factors like leather aging effects can influence longevity, causing some fading or cracking over time. To maximize lifespan, keep the painted edges clean and avoid excessive friction. Regular touch-ups help maintain the look, ensuring your edge paint stays vibrant despite leather aging effects, so your craftsmanship remains impressive over time.
Is Special Equipment Needed for Professional Edge Painting?
You don’t need special equipment for professional edge painting, but using the right tools can improve your results. Professional equipment like edge paint applicators, brushes, and heat tools help you attain clean, even lines and a durable finish. Mastering edge painting techniques with quality tools can make your work look more polished and last longer. Investing in proper equipment ensures you get professional-looking edges every time, saving you time and effort.
Can Edge Painting Be Done on Curved or Textured Edges?
Yes, you can definitely do edge painting on curved edges and textured surfaces. With careful control, your brush or applicator glides gracefully over the grooves and curves, giving your leather a sleek, stylish finish. Patience and precision are key, so take your time to follow the contours and textures. Using the right tools, you guarantee smooth, stunning results that enhance your leather’s luxurious look, no matter the shape or surface.

WONVOC Leather Edge Burnish Kit 2 PCS Ebony Wood Leather Burnisher Tool, Round Head Leather Edge Burnishing Tool, Leather Edge Slicker Burnisher, Leather Craft Tool
2 pcs Leather edge burnish set: Made of high-density ebony, including a round burnish and a thin one….
As an affiliate, we earn on qualifying purchases.
As an affiliate, we earn on qualifying purchases.
Conclusion
Now that you’ve learned the art of edge painting on leather, you’re like a skilled artist adding the final strokes to a masterpiece. With each careful brushstroke, you’re transforming a simple project into a shining jewel of craftsmanship. Remember, patience turns rough edges into smooth, polished borders—like a sculptor revealing hidden beauty. So, keep practicing, and soon your leather creations will catch eyes and spark admiration, shining brightly like a beacon of your skill and dedication.
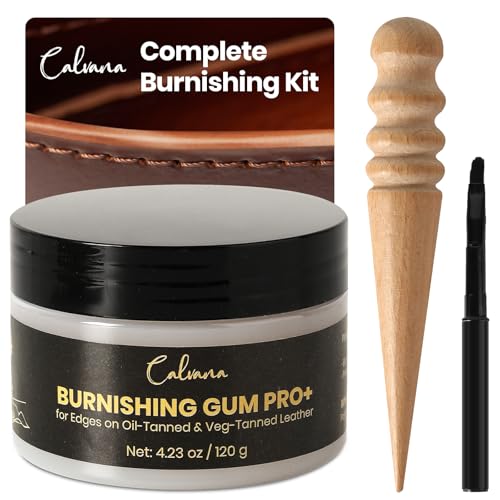
Calvana Pro Burnishing Gum 4.23 oz, Includes Ebony Edge Burnisher and Applicator Brush, for Edges on Oil-Tanned & Veg-Tanned Leather, Burnishing & Polishing, Water-Based
Complete Burnishing Kit: Our leather edge burnish kit includes an ebony edge burnisher tool, an applicator brush, and…
As an affiliate, we earn on qualifying purchases.
As an affiliate, we earn on qualifying purchases.

Smalltongue 14 Original Colors Acrylic Leather Paint Kit for Shoes, Sneaker, Couches, Bags, Car Seat, Acrylic Leather Dye Set with Leather Preparer and Deglazer(Each Bottle 30ml)
14 Vibrant Colors: Smalltongue Acrylic Leather Paint Set comes with 14 Bulk Vibrant Colors. The Acrylic Leather Paint…
As an affiliate, we earn on qualifying purchases.
As an affiliate, we earn on qualifying purchases.