TL;DR
Most small spaces benefit more from smart placement and absorption than from soundproofing. Moving your rig into a closet with proper ventilation can eliminate noise issues, but only if you manage heat and airflow effectively.
Ever tried to record in a tiny closet and ended up with harsh echoes or noisy backgrounds? The secret isn’t just slapping foam on the walls. Instead, it’s about where you put your gear and how you treat the space around it. You’ll learn that moving your rig into a closet isn’t just a hack—it’s a game-changer, if done right.
This guide will unpack the most effective ways to dampen sound, why placement beats absorption, and how to turn a small, reflective space into a quiet, usable studio. Whether you’re recording vocals or just trying to keep noise down, this approach can save you a lot of headaches.
Acoustic dampening
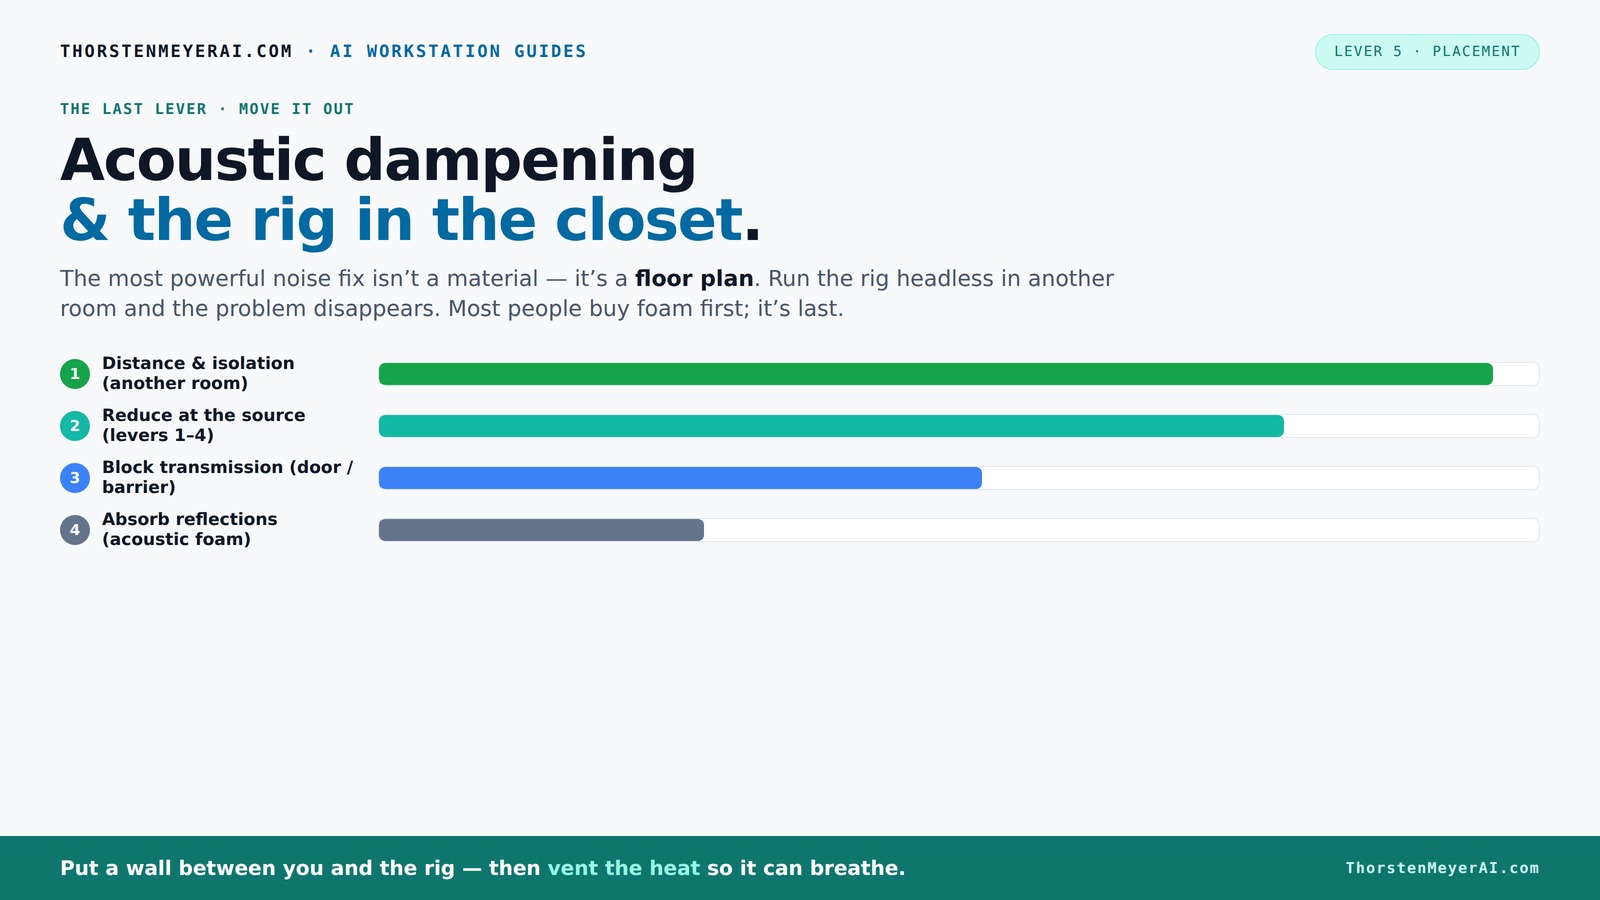
& the rig in the closet.
The most powerful noise fix isn’t a material — it’s a floor plan. A rig you can’t hear because it’s in another room beats any amount of foam. Tap the approaches in Part 1 to see what actually works.
(another room)
(levers 1–4)
(door / barrier)
(acoustic foam)
Contain the noise, not the heat
Key Takeaways
- Moving your rig into a separate room or closet dramatically reduces noise—more than foam or panels alone.
- Proper ventilation is crucial—sealed closets trap heat, risking overheating and throttling your hardware.
- Targeted placement of acoustic panels at reflection points beats covering every surface blindly.
- Sealing the door with weatherstripping or acoustic blankets makes a massive difference in noise leakage.
- Bass traps in corners tackle low-frequency buildup common in small, reflective spaces.

Focusound 52 Pack Acoustic Foam Panels 1" x 12" x 12" Sound Proof Foam Panles Soundproofing Noise Cancelling Wedge Panels for Home Office Recoding Studio with 300PCS Double-Side Adhesive
Soundproofing - Acoustic foam panels triangular grooves structure for better noise absorption, helps to reduce and absorb unwanted...
As an affiliate, we earn on qualifying purchases.
As an affiliate, we earn on qualifying purchases.
Why Moving Your Rig Is the Biggest Noise Hack
Placing your noisy, heat-generating machine in another room beats any foam or panel you could buy. Think of your rig as a roaring lion—if you put it behind a wall, the sound just doesn’t get to you. It’s like having a soundproof door without the effort.
Imagine working on a project while your GPU hums in a closet on the other side of the house. Your workspace remains silent, and the noise is trapped where it can’t bother you. That’s the beauty of the 'rig in the closet' trick. Just ensure you’ve got a stable network connection and proper airflow.

Portable Vocal Booth for Recording, Portable Recording Booth for Home Studio, Acoustic Treatment to Reduce Echo, Sound Isolation Booth, 5-Min Assembly w/Travel Bag, Lights, Phone Holder (2026 Update)
🎙️PORTABLE VOCAL BOOTH FOR RECORDING CLEANER TAKES – Portable vocal booth for recording that turns loud rooms into...
As an affiliate, we earn on qualifying purchases.
As an affiliate, we earn on qualifying purchases.
How to Ventilate a Closet Rig Without Turning It Into a Sauna
Putting a heat-spewing machine in a closet can turn that tiny space into a sauna. The key is airflow. Without proper ventilation, your rig will throttle or overheat, defeating the purpose.
Here’s what works:
- Passive vents—holes or vents that let hot air escape naturally.
- Quiet exhaust fans—small, low-noise fans that pull hot air out and bring in cooler air.
- Thermostatic controls—automatic fans that kick in only when needed.
For high-power rigs, consider a purpose-built soundproof cabinet with ducted airflow. These combine sound dampening with cooling, keeping your rig happy and silent outside.
Check out this [guide on cooling and noise in high-power rigs](https://thorstenmeyerai.com/reduce-heat-noise-ai-workstation/).

Audimute Soundproofing Acoustic Door Seal Kit - Door Sweep and Seal - (Large Size)
Includes (2) Door Seals (3/16" x 1/2" x 50') and (1) Door Sweep (1/2" x 1.5" x 25').
As an affiliate, we earn on qualifying purchases.
As an affiliate, we earn on qualifying purchases.
The Truth About Acoustic Dampening: Foam, Blankets, and Panels
Acoustic dampening materials like foam, blankets, and panels are about reducing reflections inside a small space. They help control echo and reverberation, making recordings clearer and more focused. However, it's crucial to understand that these materials don’t prevent sound from escaping or entering the room—that's the realm of soundproofing.
In tiny closets, foam can significantly cut down on harsh echoes, but relying solely on foam panels might leave you with residual sound leakage through gaps or cracks. Thicker panels (2-4 inches) are more effective at absorbing lower frequencies, which are often the hardest to tame in small spaces. But even the best foam won't eliminate all sound leaks—doors, vents, and cracks act as open pathways for sound to escape or intrude.
For instance, adding foam panels on the walls and sealing gaps around the door with weatherstripping can reduce echo and reverb by up to 50%. But if you want real sound isolation, you need to address leaks directly—otherwise, noise can still escape or intrude from outside sources.

Sound Addicted - Studio Monitor Isolation Pads suitable for 6.5, 7 and 8 Inches Large Speakers | Reduce Vibrations and Fits most Stands - Pair | SMPad 8
SMPad 8 is made out of the highest quality acoustical foam (50kg/m^3 density).
As an affiliate, we earn on qualifying purchases.
As an affiliate, we earn on qualifying purchases.
Placement First: How to Decide Where to Treat Your Closet
Your treatment depends on where sound bounces first—and that’s usually the reflection points. Start by standing in your closet with a mirror or just your ears to find where sound hits first.
Place panels at these points: behind the mic, on side walls facing each other, and on the ceiling. If your desk is near a wall, treat that too. For bass buildup, add corner traps—especially in tight, parallel-walled closets.
For example, if your microphone faces the door and you notice harsh reflections, focus foam or blankets on the wall behind the mic and the door itself. This targeted approach is more effective than covering every inch blindly.
Understanding why these points matter is key: reflections at these spots cause comb filtering and echo that can color your recordings. Proper placement reduces these issues, leading to clearer sound and less need for excessive treatment.
Should You Seal the Door or Treat It? The Weak Spot Dilemma
Doors are the typical weak link in tiny studios—they leak sound and reflect it right back. Treating or sealing the door makes a big difference because it directly impacts how much sound escapes or enters, affecting both noise leakage and internal reflections.
Sealing gaps with weatherstripping or acoustic sealant reduces sound leaks significantly, often by 20-30 dB, making your space much quieter outside. Hanging a heavy blanket or acoustic panel over the door can absorb some reflections and dampen sound transmission further. For maximum isolation, replacing the door with a solid, mass-loaded barrier can be effective, but that’s more involved and may not be practical for everyone.
It's important to recognize that even small gaps around the door frame can drastically reduce the effectiveness of your treatment. The tradeoff is that a well-sealed door not only reduces noise leakage but also minimizes internal reflections that can muddy your recordings.
Do You Need Bass Traps or Just Panels? The Low-Frequency Problem
In tiny closets, low-end buildup and standing waves can turn your recordings into a muddy mess. Bass traps in corners are your best friend here because they absorb the frequencies that standard foam panels can't handle effectively.
Adding 4-inch thick bass traps in the corners helps tame these problematic low frequencies, especially if you notice boominess or uneven bass response. These traps absorb low-end energy before it reflects and causes phase issues, which can distort your recordings and make mixing difficult.
For example, if your voice sounds boomy or your bass-heavy synths distort, installing corner traps can reduce low-end muddiness by up to 60% in small, reflective spaces. The tradeoff is that bass traps are more expensive and bulkier, but their impact on clarity is often worth it in tight, reflective environments.
Coverage Tips: How Much Acoustic Treatment Is Enough?
More treatment generally means better control—up to a point. In tiny closets, covering all walls with foam isn’t necessary and can even be counterproductive by making the space sound muffled or unnatural. Instead, focus on the most critical reflection points, the door, and corners where low frequencies tend to accumulate.
Start with panels on the side walls, behind the mic, and on the ceiling. Add bass traps in the corners if you notice low-frequency issues or uneven bass response. Using thick panels (2-4 inches) for these areas enhances low-frequency absorption and prevents phase issues.
For example, covering about 40-60% of the wall area around your mic and including corner traps usually strikes a good balance between control and practicality. Excessive treatment can lead to a dull, boxy sound, so always listen critically and adjust accordingly.
Frequently Asked Questions
Can a closet really work as a vocal booth or recording rig?
Yes, if you treat the reflection points, seal gaps around the door, and provide ventilation, a closet can be a surprisingly effective vocal booth. It’s all about controlling reflections and low-end buildup in a tiny, reflective space.What’s the difference between acoustic treatment and soundproofing?
Acoustic treatment reduces reflections and echo inside a room, making recordings clearer. Soundproofing blocks sound from leaking out or in, often requiring sealing gaps, adding mass, and vibration decoupling. They serve different goals—treatments improve sound quality, soundproofing keeps sound contained.Where should I place foam or blankets in my closet?
Focus on reflection points—walls behind the mic, side walls facing each other, and the ceiling. Treat or cover the door with blankets or panels. Use bass traps in corners if you notice low-end issues. Targeted placement is more effective than covering everything.Do I need bass traps in a small closet studio?
Yes, especially if you notice boomy sounds or uneven bass response. Corner bass traps absorb low frequencies that cause muddiness, improving clarity in your recordings. They’re especially helpful in tiny, reflective spaces.How much acoustic treatment do I need?
Start with panels covering reflection points, the door, and ceiling. Add bass traps if low-end issues are evident. Covering 40-60% of the critical areas in your closet often provides a good balance of control and simplicity.Conclusion
In tiny spaces, smart placement and targeted dampening beat chasing the perfect soundproofing. Moving your rig into a closet with proper ventilation can make your workspace whisper-quiet. Remember, the best studio is the one you build with your ears, not just with foam.
Next time you set up, think about where sound comes from and where it goes—then treat those spots. Your recordings will be clearer, your neighbors happier, and your stress lower. The secret is simple: distance, ventilation, and strategic dampening.